Fringe As You Weave

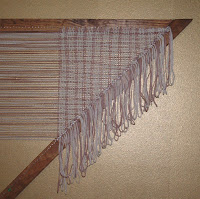
Someone on the TriLoom group showed how she created her looped fringe while weaving her shawls instead of attaching it after the weaving is complete. I tried it and couldn't get it to work for me. But it led to another idea and I created a method that does work for me. Here's my instructions for doing this along with a glimpse of my next shawl. You can enlarge any of the pictures by clicking on them.

Figure out how long you want your fringe to be.
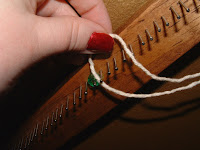
Measure down from the corner of your loom and mark the peg or nail at that spot. You will need to move your marker down as you work, so use something that you can easliy slip off and on. I used a pony bead to mark my nail.
Repeat this on the other side of the loom unless you only want fringes on one side of your shawl.
 Weave your loop down through and pull it past your nail.
Keep both sides of the loop on the top side of your nail.
 Move your marker down one nail.
Place your loop over the nail your marker had been on.
 Pull the excess yarn out by pulling up on the yarn leading to your skein from the top of your loom.
Note: I use the point down method. If you weave point up, this will be coming from the bottom of your loom instead of the top.
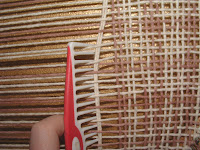
 Straighten your weft.
Take your loop off the nail.

Loop it over the nail it comes down next to.
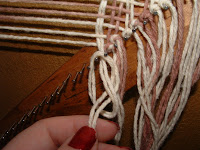
 Tie a knot.
Leave the knot on the nail. The nails keep the knots loose enough to untie in case you make any mistakes in your weaving and need to back up.
 Pull your yarn across to create your next warp.
You are now on the opposite side of your loom. The rest is very similar to the first half so I stopped taking photos.
- Move your marker down one nail.
- Pull your yarn down over the nail your marker just moved from.
- Pull the excess up from the top.
- Straighten the weft.
- Take your loop off the bottom nail.
- Loop it around the nail it comes down next to.
- Tie a knot.
This will create looped fringe, or cut the loops to create straight fringe. Since I forgot to move that marker down a couple of times on the shawl pictured above, my fringe is not even. To correct that I will be cutting the fringe to even it out for this shawl.


4 comments:
Thanks for dropping by my blog and making a comment.
What an interesting blog you have here and how clever you are.
I love weaving and you make such beautiful things
Love the triangle shawls! Cheers from down under.
--Karen
Looks like it will be a very pretty shawl. I'm a fiber artist and weave on a 36" four shaft floor loom, but am a loom junkie and have been drooling over a triangle loom for some time. While looking for triangle loom info, stumbled across your blog. Looking forward to seeing the finished piece!
The cottage arts are alive thanks to people like you! ya!
Donetta
Thanks for the shared knowledge.
Post a Comment